Galette Ananas (with how-to)
Pineapple Galette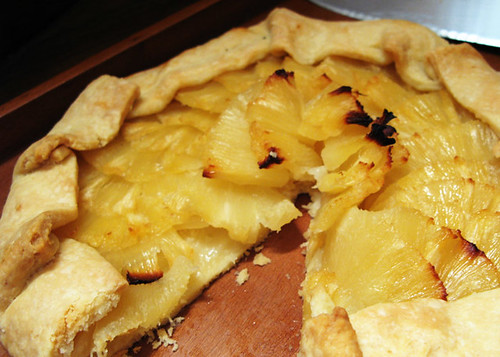
I got the idea from Flo Braker's The Simple Art of Perfect Baking, but I used a different recipe for pâte brisée, one that I already used before. This dessert has no added sugar; in fact it would have no sugar if Del Monte would not add heavy syrup to every living thing. I understand they need it to preserve the pineapple, but I guess that's my fault for not wanting to use a fresh pineapple. Braker also wanted the slices in concentric circles; I used a spoke design because it looked prettier in my head.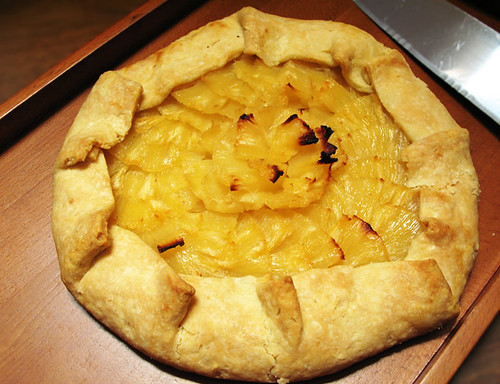
Pâte Brisée means broken pastry in French. It's supposed to be tender and flaky. Here in the Philippines, temperature is close to body temp, so making pastry is hard but not impossible. All you need to remember is to work quick and not to overdo it.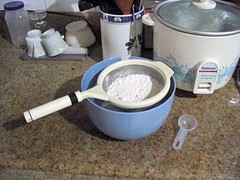
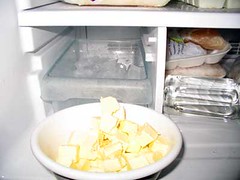
The first thing to do is to prepare everything (in cooking, always use the principle of mise en place-- everything in its place. It will save you the scurrying later). Cut the butter into cubes and place in the freezer. Everything has to be cold when making pastry, and some even put the flour in the freezer but I find that excessive. While waiting for it to get stone-hard, place the dry ingredients (flour and salt) in a strainer. Don't sift until just before you start so the particles are well-aerated and won't form lumps (thus harder to work in).
When ready, take a small bowl of ice water and keep on the side. Sift like mad. I use a pastry blender with rigid tines (flexible tines are useless).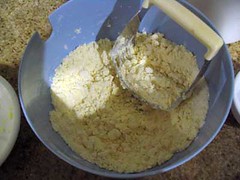
Cut in the butter with the pastry blender (force the flour in between the cut flakes of cold butter) until the particles are the size of small peas and coarse crumbs. It's better to have large pieces of butter than to overdo it. The idea is to form lamellations of butter and flour to create a flaky pastry, not to make it homogenous like a cookie. If at any time the butter becomes too soft, put it back in the fridge until it's firmer. Also, that means you've been taking too long. It shouldn't be more than a few minutes. Use your forearm muscle!
Add ice water a tablespoon at a time until it just comes together. Any more and it will be soggy. In our humid climate it only takes about 3 tablespoons. As you can see, I've pinched a small mass there-- good enough to roll out.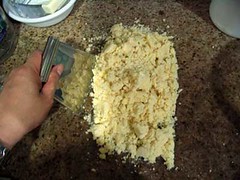
Lay it out in a mound on the counter.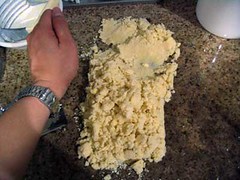
This technique is called fraisage, or milling. Basically it means squishing your dough across the counter in a few strokes to spread the lamellations, making it more stable. It's not a "must" but if you have a juicy filling, it helps so the juice doesn't seep out through tiny cracks. I used my left hand because I'm taking pictures. I got some of the dough on my watch.
After two cycles of mounding and fraisage, I formed it into a 4-inch disc, wrapped in plastic wrap, and...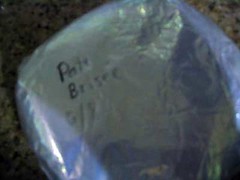
... wrapped in foil and dated. I did this about 2 weeks ago. It will be fine for a month so the date on the front is important! It's great for making ahead of time.
For the pineapple, I cut each slice into 2 through its width, so I had double the quantity of thinner slices. After draining, I put it back in the can with its top still mostly on and put it in the fridge upside-down in a bowl overnight. When it comes to making pineapple pastries, you want to get rid of excess juice so you don't steam or boil your creation. However, draining on paper towels overnight would just rob it completely of its juice. In the morning, I just roll out my thawed dough, arrange the slices, then bake.
Easy as pie, isn't it? Well, IT IS!