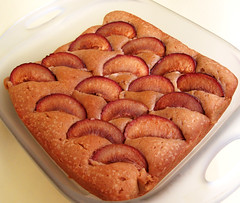
31 October 2007

Banoffee Pie

Banoffee Pie (with title)
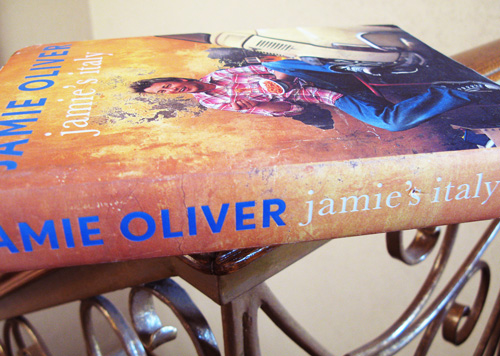
I'm just teasing here (obviously), but the British are CRAZY. While I believe that the old cliché that British food is bland is an untrue one, I have the suspicion that some of their desserts (namely: Sticky Pudding, Millionaire's Shortbread, and now Banoffee Pie) were created to compensate for a dissatisfied taste bud. I don't know! It was the seventies! Who knows how bland food was back then (uh... people older than 30?)! But here we are now in the Philippines, where bananas rule. It would be a shame not to try it. I took a cue from Jamie Oliver's book Jamie's Kitchen which I got on sale (again).
Banoffee Pie Prep
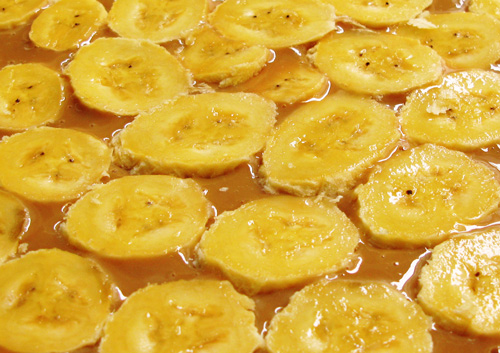
Jamie's Kitchen was a documentary/ reality series where Oliver took 15 unemployed and underprivileged youngsters under his wing and trained them as chefs for his then-new restaurant, "15". I caught a glimpse of it on the Lifestyle network and though I had to read magazines during it to keep from sleeping, there was an awesome moment which I have to now share. You see, Oliver sent his protegées to a tavern to prepare for the hard life of, er, employment in a kitchen. Unfortunately, two of the girls had gotten used to their lazy ways and their disdain for work was seen in the shoddy food and their tardiness. So when it was time for the owner of the place to say goodbye to them and send them to Jamie's for good, she was kissing their cheeks and basically, kindly, cheerfully, and awesomely telling them that they were no good in the kitchen and she doesn't see it happening for them. Quite honestly she said that what they experienced under the scrutiny of TV production wasn't real-- work is not a triumph a week, goal done, NEXT! kind of affair. It's a long, continuous, utterly same-y process of making your way to the top (and probably this blog author's greatest complaint about his impending "life"). When it was time to say goodbye to their experienced co-workers, they exchanged kisses and the lazy girls were crying too, and the guy amusedly exclaims to the camera, "Tears!" Awesome, non-sentimental jolly guy. (Recipe follows)
Banoffee Pie whole
Dulce de leche, which is the "toffee" in this recipe, is an Argentinian invention, I believe, though true cajetas is made by slowly cooking goat's milk in massive amounts of sugar. Regardless, this is how Latina grandmothers roll nowadays, so don't be ashamed. It's supposed to be thick and when chilled, barely move, but condensed milk differs and while mine was gloriously rich and thick, bananas can still sink in them and you will get a flood of dulce de leche everywhere. So I've deviated from my procedure here.

Making dulce de leche
You'll need 3 300-mL or 2 14-oz (400mL) cans of condensed milk (there are differences in the available can sizes between countries, weirdly). In a large pot, lay the cans down and add enough water so that the cans are completely submerged. If they float, you'll have to weigh them down with a brick or something. Bring the water to a boil over medium heat and keep boiling for 3 hours. Always make sure to keep the cans submerged, so have some extra water nearby always. If you let it dry up, the cans might explode and you will have dulce de ceiling, not to mention a possible injury. So if you're feeling lazy and don't want to periodically watch the cans, don't do this at all.

Alternatively, you could use a pressure cooker, which is what I did. Lay the cans down on the cooker and cover with boiling water. Ensure that the lid is shut tight and bring to a boil over high heat. Once the cooker achieves proper pressure (the indicator/ valve is whistling or turning), turn the heat down low (make sure the whistling/ turning continues) and cook under pressure for 1 hour. If the turning of the valve stops, that means there's no water left, so if you're not even close to an hour cooking, you'll have to stop and add more water. Once done, release the pressure (you know, douse the top with cool running water, release the valve, release the lid), and cool at room temperature.

The last method is via the oven. In a deep oven-safe pot, roasting pan, or dutch oven, cover the cans completely with boiling water and bake in a preheated 275°F (135°C) oven for 5 hours. You'll have to still make sure that the water doesn't dry up, but since it's a closed environment, it happens much slower if ever.

Wait till the cans are room temperature before opening, or Charles's Law will kick your ass and you'll get dulce de face.

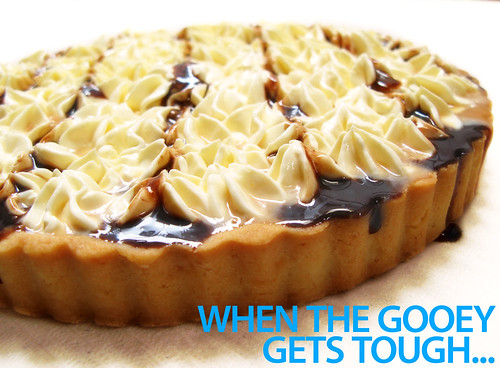
Banoffee Pie (actually a tart)

  • 1-1/2 (210g) cups all-purpose flour

  • 1/2 cup (50g) confectioners' sugar

  • 1/4 teaspoon salt

  • 1 stick plus 1 tablespoon (9 tablespoons or 130g) unsalted butter, cut into small pieces and frozen

  • 1 large egg yolk

  • 3 large ripe bananas

  • dulce de leche as above

  • 1-1/2 cups (375g) heavy cream, chilled

Sift together the flour, sugar, and salt into a large bowl. Using a pastry blender or two knives, cut in the butter until the mixture resembles oatmeal (large crumbs), then cut in the egg yolk until the dough comes together into small curds.

Grease a 9-inch fluted tart pan and press the tart dough into the bottom and up the sides. Don't be too heavy-handed with the pressing-- apply only enough pressure so the dough clings together and can still crumble, but you don't want to have a hard, stony crust. Freeze for at least 30 minutes, preferably longer.

Preheat the oven to 375°F (190°C) Grease a piece of foil large enough to cover the tart and place it grease-side down on the crust. Bake in the middle rack of the oven on a sheet pan for 25 minutes, then remove the foil and bake for 8 minutes more. Set the crust aside to cool. Meanwhile, whip the cream until it forms firm peaks and set aside in the fridge.

Spread some dulce de leche on the bottom of the cooled crust, only enough to make a thin layer. Slice the bananas 1/4 inch thick and lay them out in one layers over the dulce de leche. Using the dulce de leche at room temperature, spoon it over the bananas only to fill the crevices between them, but not enough to make them float. Place another layer of banana slices over this and repeat. Place the whipped cream in a piping bag and pipe a design on the top. Alternatively you can just spoon it in and form swirls. Use the remaining dulce de leche to make a striped pattern on top, or you could do as I did and squeeze some chocolate syrup on.

29 October 2007

Kesong Puti-Spinach Ravioli with Bay-Brown Butter Sauce

Kesong Puti-Spinach Ravioli with Bay-Brown Butter Sauce (with title)
I have to admit I don't frequently challenge myself with using Filipino ingredients or cooking Filipino food (because: you can get that anytime here). For this edition of "Lasang Pinoy" (The Filipino Taste), where we are to prepare a meal inspired by and for a Filipino hero, I chose to create a dish in honor of Francisco Balagtas, and I'd like to think he would be the kind of person to not be freaked out by a "new" dish with an Italian influence.
Kesong Puti-Spinach Ravioli in Tomato Sauce
The same ravioli with good old-fashioned tomato sauce.
Why did I choose Francisco Balagtas? He certainly didn't make second year high school any easier for me (Pag-ibig anaki'y aking nakilala/ Di dapat palakhin ang bata sa saya...-- sorry if I misquoted). But I do love the idea of one of our heroes-- a military man at that-- is responsible for the advancement of Filipino literature (together with our National hero Jose Rizal of course). It's a salient point in our culture that we revere those figures in history who showed the Spanish colonists that we were so much more than the "indios" we were perceived to be, and that we were capable of great academic advancement. (Naturally I think Juan Luna is awesome too-- I ought to write about those Filipino artists I admire.) (Recipe follows)

I realize it sounds a lot like a Project Runway challenge but I drew inspiration from the wreath of laurel leaves which commonly sits in his head in portraits. That, and I used Filipino ingredients. It was rare when I was a kid, but now Spinach and Arugula are grown in cooler areas of the Philippines.

Prepare the filling by wilting 2.5 ounces (70g) fresh spinach or 70g frozen spinach in a saucepan or in the microwave on high for 2 minutes. When warm enough to handle, squeeze out all the spinach water and chop the wrung bundles finely. Stir 200g of kesong puti (white goat's or cow's milk cheese) in a small bowl until smooth, then add the chopped spinach, salt and pepper to taste, and 2 tablespoons freshly grated parmesan cheese. (Can be prepared a day in advance. Store covered in the refrigerator.)

Prepare pasta as directed here using 6 ounces (170g) of flour and 2 eggs. Cut the rested dough into 4 small balls and run through the pasta machine until it reaches the thinnest setting. On 2 of the sheets of pasta, place teaspoonfuls of the filling 2 inches apart, then lay the 2 other sheets of pasta on top. Seal the area around the filling, pushing out any air before sealing completely. Cut into individual squares. (Can be prepared 4 hours in advance. Keep covered with a damp tea towel in the refrigerator).

Bring 2 liters of water in a large pot to a rolling boil and add a generous pinch of salt. Drop the ravioli, cooking 4 pieces at a time, and take each one out of the pot with a strainer or spider as soon as they rise to the surface. Drizzle the cooked ravioli with olive oil to keep from sticking in the meantime.

In a dry pan, toast a handful of pine nuts until brown, then set aside. In the same pan over low heat, add 2 tablespoons (30g) unsalted butter and 1 clove of garlic that you've minced and heat gently. It will start to bubble, then shortly after, the milk solids will brown and sink, and soon you will be left with brown butter (use a white spoon or white plate on the side to check the color frequently). Turn off the heat and stir in a whole bay leaf for 15 seconds to infuse the flavor, then discard the bay leaf. Add to the pine nuts and set aside. In the same pan over medium heat, toast the ravioli until the surface is golden brown, about 2 minutes a side.

Arrange a few leaves of arugula on the plate. Top with the ravioli and drizzle with the brown butter sauce and pine nuts. Top with cracked black pepper. Serve with calamansi or lemon.

27 October 2007

Cauliflower and Broccoli Flan with Spinach Béchamel

Sformato di Cavolfiore e Broccolo con Balsamella di Spinaci
Cauliflower and Broccoli Flan with Spinach Béchamel (with title)
In the Philippines, the concept of a "course" is not engrained in the culinary consciousness. This dish is, in typical Italian trattoria fashion, the meal's antipasto which comes before the pasta course. Say what? Most Filipinos are satisfied appreciating the diversity that comes from piling different entrées on their plate during a party. There is no "pasta course." Why, if you serve the food one after the other, you might for a few seconds realize you are full and not want any more. So instead I'm disguising this extremely vegetable-laden antipasto as a side dish. If you're feeling low on antioxidants (though I don't know how you would feel that) and fiber, this gratin is the perfect solution. And guess what, it tastes so good that my mom actually packed up the leftovers for her lunch the next day.
Reusable Grocery Bag
While we're on the subject of going green on your food (remember, you need 5 servings of fruits and vegetables a day!), it's time we acknowledged the ongoing trend for reusable grovery bags-- in the rest of the world, I guess. Whenever I bring mine (PhP99 from all Rustan's supermarkets) and I tell the cashier not to bother with the plastic, I always get a puzzled look. In fact, when I bought it, the bagger was going to put it in a plastic bag. Ha ha ha. You have to admit it's a lot more fashionable than a plastic bag tumor stuffing your back pocket, though it's too bulky to stuff in your pocket. I don't mind carrying it around folded. Those landfills are not going to magically go away. (The great irony of life is, when I forget to bring it, that's when the bagger decides to double-bag my groceries. Ha.) (Recipe follows)

It's better to use fresh broccoli. I added a few frozen ones to fill in the gaps-- they were mushier than I would have wanted by the time the cauliflower was done. You can use low-fat milk if you like.

(adapted from Bon Appetit magazine)

  • 2-1/2 cups cauliflower florets (500g cauliflower on the stalk)

  • 2-1/2 cups broccoli florets (500g broccoli on the stalk)

  • 12 ounces (about 350g) bags baby spinach leaves or frozen spinach

  • 6 tablespoons (3/4 stick or 90g) unsalted butter

  • 1/4 cup (35g) all-purpose flour

  • 2/3 cup (170g) whole milk

  • 2/3 cup (120g) freshly grated Parmesan cheese


If using whole broccoli and cauliflower, cut off the huge stem and roughly separate the florets-- it doesn't matter if they are large florets at this point. Bring a large pot of water (2 liters) to a rolling boil; add a generous pinch of salt and boil the florets for 6-8 minutes or until crisp and tender. Drain into a colander, saving 2/3 cup of the cooking liquid.

Place the spinach in a microwave-safe bowl and put a microwave-safe plate on top. Nuke on HIGH for 2 minutes or until wilted. If using frozen spinach, nuke until completely thawed. If you don't have a microwave, toss the spinach (in the same pot you boiled the vegetables in, whatever) over medium-high heat until wilted. When the spinach is warm enough to hold in your hands, squeeze all the water you can out of them and chop the wrung bundles of spinach finely.

Dry the pot you boiled the vegetables in and place over medium heat. Melt the butter, then add the flour and whisk until smooth, about 2 minutes. Gradually whisk in the milk and the reserved cooking liquid. Whisk constantly until it thickens and boils (3 minutes), then turn off the heat and stir in the cheese and chopped spinach. Give the sauce a taste-- season with salt and pepper if you wish (I just added pepper). Crumble the broccoli and cauliflower into the pot (when you press and roll the florets between your fingers, you'll find they fall apart easily and won't be squishable). Stir to combine. Place in an oven-proof dish. You can wait until it cools completely, cover it with plastic wrap, then refrigerate until the next day, or bake it already.

Preheat the oven to 350°F (175°C). Place the dish on the top rack of the oven and bake for 25 minutes (35 minutes if you chilled it). I find that I want the top to be browner and dryer, so I increased the heat to 400°F (200°C) and left it in the oven for 10 minutes more, or until the top forms a nice crust.

25 October 2007

Pad Thai

Pad Thai (with title)
Just yesterday it was my mom's birthday, so I prepared 5 courses and dessert. My neck still hasn't recovered from a whole day of looking down on what I was chopping, but it was worth it to try out some new dishes. I realize that it's risky business to try out untested food on guests, but I wasn't about to do all repeat performances; I'm not yet that boring. Now, one of the Chinese traditions that somehow rubbed off to Filipino society is the serving of noodles at a birthday for long life. I don't like superstition but I do love noodles, so why not. And just to give myself a break from making one Italian pasta dish after another, I made Pad Thai. Complex with the flavors of peanuts, sugar, fish sauce, and a lot of unidentifiable substances to those unfamiliar with Thai cooking traditions (me included), it's one of our favorite Thai dishes.

The problem with the recipe I got was that it called for tamarind paste (a very dark-colored substance), which try as I might, I couldn't find. Instead I used Mama Sita's "Biglang Sinigang" ("Suddenly Sour soup") paste made with tamarind, which looked like pale baby food, but less palatable. But even with bananas in the ingredients, it had to taste like tamarind. It costs only P30 (30p or 66¢), but it doesn't sell well (compared to instant sinigang powder mix), so I'll have to improvise some more when it goes away. The recipe I got is from mamster of the eGullet forums again, with some ingredients adjusted to my taste and to give it a darker color. (Recipe follows)

Note on the picture: those are sticks of chicken satay which I prepared on the side. I'll share a recipe once I get it perfectly. Also, those of you who read Graeme's blog (and you really should) might recognize the bowl. I loved the pattern so much I bought two.

Pad Thai

  • 2 tablespoons tamarind paste (tamarin me chua)

  • 3/4 cup boiling water

  • 2-1/2 tablespoons fish sauce (patis)

  • 2 tablespoons soy sauce

  • 1 tablespoon apple cider vinegar

  • 3 tablespoons brown sugar

  • 1 teaspoon cayenne pepper

  • 1/4 cup vegetable oil, divided (I used sunflower, but peanut oil is best)

  • 8 oz thin rice stick noodles ("Hofan"-- look for brands made in Thailand)

  • 2 eggs

  • 1/8 tsp salt

  • 12 oz (350g) shrimp, decapitated and peeled

  • 2 cups water

  • 1/4 cup salt

  • 1 tablespoon minced garlic (about 3 cloves)

  • 3 tablespoons minced shallots (about 2 shallots)

  • 2/3 cup chopped roasted peanuts (I used salted peanuts since they're cheaper than unsalted!)

  • 3 cups (250g) mungbean sprouts (togue)

  • 5 scallions, chopped fine

  • 1/4 cup (1 bunch) cilantro leaf


Dissolve the 1/4 cup of salt in 2 cups of cold water. Soak the shrimp in this solution for 30 minutes in the fridge.

In the meantime, soak the rice stick noodles in hot water (60°C or 140°F) for 20 minutes.

In a small bowl, pour boiling water over the tamarind paste. Let sit for 2 minutes, stir well, then strain into another bowl, discarding the undissolved solids. To the tamarind water, add the fish sauce, soy sauce, vinegar, sugar, cayenne pepper, and 2 tablespoons of the oil. Set aside.

Drain and pat the shrimp dry between thicknesses of paper towels. Drain the rice noodles and set aside. Heat 1 tablespoon of the oil in a large skillet over smoking-hot heat for 2 minutes, then add the shrimp. Stir-fry for 2 minutes. Remove the shrimp from the oil and set aside. Add the last bit of oil into the pan and reduce the heat to medium. Stir-fry the garlic and shallots for 1-1/2 minutes. Add the egg and scramble for 20 seconds. Add the noodles and bean sprouts and toss to combine with the eggs well. Add the sauce and increase the heat to high. Toss well until the noodles are thoroughly coated. Add the peanuts, all but half a tablespoon of the scallions, and the shrimp. Toss 2-1/2 minutes or until the noodles are tender. Transfer to the serving platter. Chop the cilantro finely and sprinkle on top with the remaining scallions. Serve with more chopped peanuts, sugar, and chili powder on the side.

22 October 2007

Hoisin Grilled Pork Chops

Hoisin Grilled Pork Chops
I'm not sure how long ago it was, but me and my brother (during the rare times he talks about cooking) were on a roll making horrible puns about Bobby Flay's book and series, "Boy Meets Grill." Ha ha ha, right? The sequel is "Boy Gets Grill." The natural progression, we were discussing, would be "Grill Dumps Boy," and "Boy Tries to Get Grill Back." So excuse me now for recycling this horrible pun, because it will not go away (even if I don't consider myself still a "boy"; though man and grill don't quite go together, do they?). The thing is, Bobby Flay does not make grilling look easy. You'd think you'll need his skill to get through cooking without infecting your family with Trichina or subjecting them to coal-like slices of meat. Well, it's not that hard. And I thought I'd begin my grilling days with one of my favorite things-- sweet barbecued pork with Chinese flavors. I got to my magazines (two different issues of Bon Appetit), then I improvised the marinade. It worked out pretty well! (Recipe follows)
Hoisin Grilled Pork Chops on the grill

Hoisin Grilled Pork Chops

  • 8 pieces pork chops 1/2 inch thick, about 1.5 kg (3 lbs.)

  • 1/4 cup Hoisin sauce

  • 2 tablespoons oyster sauce

  • 2 tablespoons soy sauce

  • 2 tablespoons Chinese cooking (Shao Hsing) wine or dry sherry

  • 1 tablespoon Chinese five-spice powder (I didn't have any on hand so I ground up a tablespoon of Sichuan peppercorns and a teaspoon of cinnamon)

  • 1 tablespoon brown sugar or honey

Combine all the ingredients except the pork chops in a medium bowl. Make sure the pork chops are thawed and toss them in the marinade. Pour the pork chops and all the marinade into a freezer (or other suitable) zip-lock bag with a gallon capacity. Push out all the air out of the bag and zip it shut. This way, the meat will be surrounded by marinade no matter what the conformation of the bag. Marinade overnight.

Prepare a grill: I used a Tefal electric grill because it's much easier to clean; make sure it is very hot (you should barely be able or be unable to stand putting your hands near the surface of the grill for 10 seconds). Cut off the fat from the pork chops to avoid curling of the meat. Grill them for 3 minutes on each side (the rule is 3 minutes per side for every 1/2 inch thickness). To be absolutely sure of doneness, juices that run from a cut in the thickest portion should be clear, or an instant-read thermometer should register 145°F (62°C) in the middle of the thickest part.
  • 2 teaspoons honey

  • 1 teaspoon water

Mix the honey and water and warm through in the microwave (15 seconds on HIGH). Brush this glaze over the finished pork chops.

Stir-Fried Shanghai Bok Choy with Ginger
  • 1 2-inch piece ginger, peeled

  • 350g (3/4 lb.) Shanghai bok choy (native pechay or regular pechay)

  • 1/4 cup chicken broth

  • 1 teaspoon Chinese cooking (Shao Hsing) wine or dry sherry

  • 1 teaspoon soy sauce

  • 1/2 teaspoon cornstarch

  • 1/2 teaspoon salt

  • 1/4 teaspoon sugar

  • 1 tablespoon vegetable oil

  • 1/2 teaspoon Asian sesame oil

Cut out 1/4-inch off the bottom of the bok choy and separate the leaves. Wash them well to remove dirt and use a salad spinner or colander to dry the leaves well.

Grate 1/2 of the ginger and cut the rest into matchstick-size pieces. Squeeze all the juice out of the grated ginger and discard the pulp. To the ginger juice, add the chicken broth, wine, soy sauce, cornstarch, and sugar and mix well. Over smoking-hot heat in a wok, add the vegetable oil and the ginger matchsticks. Stir-fry for 5 seconds, then add all the bok choy and cook until wilted, about 1-2 minutes. Add the juice mixture and cook for a minute more. Fish out all the bok choy and boil the sauce until quite thickened, about 2 minutes more, then pour over the bok choy. Drizzle the sesame oil over the dish.

20 October 2007

Red Velvet Cake

Red Velvet Cake (with title)
I have to begin this by apologizing to my friend Noah. After being enamored by Sonia's Red Velvet cupcakes, he has wanted me to make some for him, but I always showed my intense skepticism due to the amount of red food coloring added to it in the recipes I researched. The range is from 1 tablespoon (15mL or about a vial of food color) to 1/4 cup (3 vials of red food color). Factor in my opinion that red food color tastes like shit, and I successfully discouraged him.
Red Velvet Cake (whole)
However, when Clara (Faith's sister) requested that I bake her birthday cake for her surprise birthday party, I had to ask the questions. What's her favorite flavor? What did she value most? What are her favorite things? What I got was chocolate and Hannah Montana. Faith later specified that the party was going to have a "Red" theme (a color as a theme?), and that Clara loves heart patterns. I didn't want to make a chocolate cake with all-red icing (that would be lame, plus the icing would possibly taste horrible-- you know what I'm talking about), and pink was not a possibility. I had to finally cave and make Red Velvet Cake, touted by an unnamed few as "the best cake they've ever tasted." What's all the fuss about? (Recipe follows)

Red Velvet Cake Layer
Faith showing off the bloody cake.
In addition to my initial fears, it was time again to exercise my cake-decorating muscles. I decided to stick with the old standby of cream cheese frosting to achieve perfection of red-velvetness. The result is an über-moist cake with shocking bright redness. It got raves, and best of all, its presentation was a show-stopper. For the decoration, I used heart-shaped candy sprinkles, only slightly sweet but very, very red (and only P40-- 40p or $1). I've learned a foolproof method for frosting the top and sides evenly with minimal mess, and I think I'll adopt it from now on. JC and Faith wanted to help out in making the cake (despite JC barely being able to separate eggs), so I busted out the aprons and we got to work!

The recipe here is adapted from Jaymes' version at the eGullet forums.

  • 2-1/2 cups (350g) sifted cake flour

  • 2 cups (420g) sugar

  • 1 cup (250g) buttermilk (this doesn't exist in the Philippines, so I added 1 tablespoon lemon juice to 1 cup of milk and let it sit at room temperature for 10 minutes)

  • 1 teaspoon baking soda

  • 1 teaspoon vanilla

  • 1 teaspoon salt

  • 3 large eggs

  • 2 tablespoons regular cocoa (not Dutch-processed)

  • 1 tablespoon apple cider vinegar

  • 1 ounce (2 tablespoons or 30mL) red food coloring

  • 2 cups (480mL) vegetable oil (I used sunflower oil for health reasons. Ha.)

Wear an apron throughout the baking process. Preheat the oven to 325°F (160°C). Grease the bottom and sides of 2 9-inch cake pans, line the bottom with parchment paper, and grease the paper too. Sift together the cake flour, cocoa, and salt into a bowl. In another large bowl, place the oil and sugar together and beat at medium speed until well-blended. Beat in the eggs one at a time. Switch to low speed and slowly add the red food coloring and vanilla to avoid splashing. Stop the machine once well-combined. Sprinkle 1/3 of the flour mixture and beat over medium speed for 10 seconds. Add 1/2 of the buttermilk and beat for 10 more seconds. Continue with 1/2 of the remaining flour, the rest of the buttermilk, and the rest of the flour (when adding the flour, I actually folded it in and did not use the mixer to maximize the cake's tenderness). Scrape down the sides of the bowl and beat until just combined, 10 seconds on medium speed.

Place the baking soda in a small dish and add the vinegar. Quickly beat into the batter over medium speed for 10 seconds. Divide the batter among the pans (use a scale if you have one to be sure). Place in the oven and bake for 40 minutes, or until a toothpick inserted through the center comes out with very few tiny moist crumbs. The cakes will not dome. Cool in the pans for 15 minutes. Unmold, peel of the parchment and replace it on the cake bottom sticky side-out, then flip each cake right side-up onto a cooling rack. Let cool to room temperature, about 1 hour or more.
  • 1 package (225g) cream cheese, softened

  • 1 stick (110g) unsalted butter, at room temperature

  • 4 cups (450g) confectioner's sugar, sifted)

Beat the cream cheese with the butter until smooth. Add the sugar and beat until very smooth.

Spread about 2/3 cup of the frosting on whichever cake is flatter and spread evenly with an offset spatula. Place the second layer on top. Using as little cream cheese frosting as possible to get a very thin crumb ("primer") coat, coat the top and sides. Place in the refrigerator for 2 hours or in the freezer for 30 minutes. Meanwhile, keep the frosting in the refrigerator.

After the chill, stir the frosting to loosen it up, then load into a pastry bag fitted with a plain tip. Place the cake on a decorating turntable or lazy susan if you don't have one (you can also just go around the cake yourself; get a turntable if you're serious about decorating cakes in the future). Pipe the frosting up and down the sides of the cake in a zig-zag fashion, the lines as close as possible to each other and reaching the top and bottom of the cake as close as possible. Pipe a spiral of frosting on the top of the cake, the circles touching each other as closely as possible. With a long metal icing spatula, lay it on top of the cake and spin the cake around to smooth the icing, making sure to wipe down the blade if it takes you more than one stroke. With the spatula or a bench scraper (warmed in hot water and wiped dry, which is what I used), appose it lightly against the side of the cake and spin the cake to smooth the sides.
Red Velvet Cake (Roses)
To place fresh flowers on the cake, wash and shake dry a dozen roses or other flowers. Get ones without pesticides (or pests, mind you) and have not been in formaldehyde. Cut them off 1/4 inch below the sepals. Lay a piece of parchment paper over the area of the cake where you want the flowers to be for added safety. Stick a toothpick halfway into the fleshy part of the calyx and poke the other half of the toothpick through the parchment and into the cake. Take apart one of the flowers and use the petals to hide exposed areas of parchment paper, attaching them with leftover frosting. Once you add the flowers, the cake will have to be refrigerated till serving time.

You can push the sprinkles into the icing if you have them. Wilton is a brand that offers them. Make sure you have a system for adding them; I placed the first 4 diametrically opposite, then filled in the gaps at regular intervals. The ribbon at the bottom is regular fabric ribbon from the bookstore, to be taken out just before cutting the cake.

Delighting You Always (When Designers Go Bad No. 3)


Okay, children! There are 10 things wrong with this advertisement. Can you spot them all?

I think the most important shortcoming of this ad is that is was designed by someone who barely has any ability to make a Powerpoint presentation. And what is UP with that (apparently clairvoyant) stick figure? It's driving me NUTS!

19 October 2007

Oh No You Did NOT Just Write That About Ming Tsai


Okay, I concede that the reporter is free to write about whatever he (?) wants, but who starts out a report about a convention with a paragraph like that?! Yikes.

18 October 2007

Broccoli and Sun-Dried Tomato Fusilli

Broccoli and Sun-dried Tomato Fusilli (with title)
And now I present to you what I believe to be the perfect picnic fare. I don't mind eating it room temperature or cold. Very much unlike sandwiches-- ugh, which I can't eat unless it's within 10 minutes after completion, or some salads, which are dripping wet with bacteria-loving mayonnaise. No thanks. We're still on a mission to get me eating more vegetables, and this dish is something I've been making for what must be years now. It's after California Pizza Kitchen's "original" dish.
Broccoli and Sun-dried Tomato Fusilli
I don't know why broccoli is one of those stereotypically disliked vegetables by children. I have always loved it. As a kid I started out eating it in Beef with Broccoli and it tasted phenomenal; later on I would eat it even just steamed with a little butter and I have no complaints. How do other families cook it? Anyway, here is a dish so idiot-proof even kids can make it, and dare I say even eat? (Recipe follows)

  • 40 pieces (about 120g) sun-dried tomatoes, preferably oil-packed

  • 8 ounces (about 200g) broccoli (preferably fresh)

  • 3 tablespoons olive oil

  • 4 cloves garlic

  • a few sprigs fresh thyme

  • 4 ounces (about a big handful or 100g) freshly-grated Parmesan cheese

  • 9 ounces (250g) dry fusilli

  • fresh-ground black pepper

Prepare the vegetables: remove the broccoli florets from the stalk and separate into bite-size pieces. Chop the sun-dried tomatoes into bite-size pieces (each tomato will yield 3-4 pieces) and place in a medium bowl. Mince the garlic very fine.

Bring 3 liters of water to a rolling boil. Ladle some boiling water, enough to cover the chopped tomatoes, and set aside for 10 minutes. Add a generous pinch of salt to the boiling water pot. If using fresh broccoli, place a steamer insert on top of the pot of water and steam the broccoli for 5 minutes. If using frozen broccoli, blanch the florets for 1 minute; take out with a slotted spoon into a colander and run cold water over them. To the water, add the fusilli and cook according to package instructions (mine took 9 minutes) to reach al dente. Drain into a colander.

Drain the tomatoes. In a large pot over medium heat (I used the same pot that I used for pasta-- the heat is enough to evaporate the residual water), add the olive oil and minced garlic. Sauté for 1 minute; avoid browning the garlic. Add in the cooked broccoli, hydrated tomatoes, and thyme; sauté for a minute to get the garlic-scented oil to coat them. Add in the drained fusilli and Parmesan cheese and toss to combine. Season with black pepper if desired. Continue tossing over the heat until the cheese is melted, about 2 minutes more.

15 October 2007

Luscious Lemon Layer Cake

Lemon Layer Cake (with title)
It's rare that you hear someone making a whole cake to use up leftover lemons, but if you bake as often as I do, you will have pounds of butter, dozens of eggs, jars of flour, and mountains of sugar just waiting to be used at the moment's notice. It's often much easier than having to go to the "farmer's market" specifically for fresh seafood to be cooked with the lemon, not to say that I didn't wish the fishmonger was just next door (at least I'd gain less pounds that way).
Lemon and Lemon
Because I didn't have enough lemon juice, I filled in the requirement with Philippine Lemon (Calamansi) juice-- very similar but slightly sourer. The resulting lemon curd was as perfect as could be. I love that this cake is so complex and requires care to make, but it still has "home baking" written all over it. Nothing convoluted about it. (Recipe follows)
Lemon Layer Cake (whole)
The procedure for making white cake here is the most unique one I've ever seen, but I barely deviated from the procedure because I wanted to try it out. The crumb is perfect, but barely different from the usual method for making butter cakes. I changed the procedure for making lemon curd to resemble Pierre Hermé's method more, because it's easier, and I deviated slightly in making the icing as I wasn't really bothered making it entirely over the stove (my arms can take a lot of punishment, I guess).

Lemon Layer Cake

  • 1 cup (250g) lemon juice from 6 lemons, or combination Lemon-Calamansi (3 lemons and about 12 Calamansi)

  • 1 teaspoon powdered gelatin

  • 1-1/2 cups (300g) granulated sugar

  • 1/8 teaspoon salt

  • 4 large eggs

  • 6 large egg yolks

  • 1 stick (115g) unsalted butter, cut into 1/2-inch cubes and frozen

Take 1 tablespoon of the citrus juice and place into a bowl. Sprinkle the gelatin on top and set aside. In a heavy-bottomed saucepan, combine the remaining citrus juice, sugar, and salt and set over medium-high heat until the sugar just dissolves (you can see all of the bottom of the pan at this point; avoid letting it boil). Place the eggs and yolks in a large bowl and whisk together. Still whisking vigorously, add half the hot juice in a thin stream, then you can liberally add the rest while whisking. Return to the stove over low-medium heat, stirring constantly until a thermometer registers 170°F (77°C) or the curd coats the back of the spoon and a track drawn through it doesn't fill with the curd (the mixture will have been boiling for about 1-2 minutes). Take off the heat and stir in the juice-gelatin mixture. Strain using a fine-meshed sieve into a blender. By this time it will have cooled to 140°F (60°C). Start the blender and drop the cubes of butter in one by one. When the butter is halfway in, stop the blender and scrape down the sides, then continue until all the butter is incorporated (the blender will not choke when the curd is smooth). If you don't have a blender, you can whisk the cubes of butter in but it will take longer to incorporate. Return to a bowl and let cool to room temperature, then place cling film flush against the surface, poke a few holes in the top and place in the fridge for at least 4 hours to firm up.
  • 2-1/4 cups (315g) cake flour, sifted

  • 1 cup (250g) whole milk at room temperature

  • 6 large egg whites

  • 2 teaspoons vanilla extract

  • 1-3/4 cup (210g) granulated sugar

  • 4 teaspoons baking powder

  • 1 teaspoon salt

  • 1-1/2 sticks (170g) unsalted butter, cut into 12 pieces, softened but still cool

Set a rack in the middle of the oven and preheat at 350°F (177°C). Grease and line 2 9-inch cake pans (at least 2 inches high). In a bowl, whisk together the milk, egg whites, and vanilla. In the bowl of a standing mixer with the paddle attachment (I used a hand mixer with the usual beaters; you could also probably use a pastry blender and a whisk if you have neither), mix together the flour, sugar, baking powder, and salt at low speed to combine. Add the butter one piece at a time until the mixture resembles moist crumbs without visible butter chunks. Add all but 1/2 cup of the liquid mixture and beat at medium speed until pale and fluffy (90 seconds). Switch to low speed and add the rest of the liquid, then beat at medium speed for 30 more seconds. Scrape the sides of the bowl and beat on medium speed for 20 more seconds. Divide the batter evenly between the 2 pans (use you scale if you have one), then spin the pans on the counter to spread the batter. Bake for 23-25 minutes or until a toothpick in the center comes out with very few tiny moist crumbs. Run a thin knife around the edges and cool in the pans for 10 minutes, then unmold and cool on a rack for at least 2 hours.

If the cakes have domed while baking, flatten the top of one with a long, sharp serrated knife. Divide the 2 layers horizontally into 2 layers each. Set one of the layers on a cake round or serving plate and spoon a third of the curd, evening out with a spatula. Set the second layer on top and repeat with the rest of the curd and the cake, finishing off with a domed cake layer if you have one. Smooth out the run-off on the sides and refrigerate.
  • 2 large egg whites, room temperature

  • 1 cup (120g) granulated sugar

  • 1/4 cup (60g) water

  • 1 tablespoon lemon juice or 1 teaspoon cream of tartar

  • 1 tablespoon corn syrup

Combine all the ingredients in a heatproof bowl set over a pan of simmering water. Using a hand mixer on high speed, beat until the mixture holds stiff peaks (when you lift the beaters, the tips of the peaks on the surface will not droop), about 7-10 minutes. Take off the heat and cool to room temperature. Spread the frosting on the cake.

14 October 2007

Silent All These Years

October is breast cancer awareness month (I've yet to concretely do anything about it since I've graduated from med school, but for now, I encourage all female readers to do the BSE and a mammmogram over the age of 40 in the absence of any obvious masses). It got me thinking about other women's issues in my country.

Most days out of the week, there are certain tabloids that instead of trumpeting the latest economic crisis or government corruption scandal, have the latest (?) rape case as its headline. In bold, red letters, you can catch up on the latest episode of grotesqueness:
SANGGOL GINAHASA NG AMA (Infant raped by father)
7-TAONG GULANG HINALAY NG ADIK (7 Year-old Molested by a Drug Addict)
LOLA, GINAHASA AT PINATAY (Grandmother, Raped and Killed)

These aren't headlines that I lifted from any specific tabloid from any specific day, but in my country those patterned headlines are sickeningly familiar. (* Disclaimer: I have almost no way of knowing if these headlines are fabricated.) Which begs the question: fabricated or not, who is the target audience of these tabloids? Men, who are warned of the consequences of such debauchery, or women, who are warned of the evils that may exist within the four walls of their home? Most rapes are committed by non-strangers in familiar situations. I've personally known at least two people who have been molested, and the culprits, members of their own families, were never reported to the authorities. From these it's clear that rape is a violation of the body and a violation of trust, which in their own ways both lead to shame and silence.

For better or for worse, the tabloids continue to plaster the horrors that these victims face for all to see, breaking the silence in such a spectacular fashion, but oddly repetitive, that they seem to blend and become less important individually as each day passes, each week, year after year after year. Even less is being done to protect the rights of children, women, and the elderly. Drug use is still rampant among all social classes. (Lord knows what nightmares reside in these people's subconsciouses, unleashed once the drugs remove their inhibitions.)

Click here to hear a direct digital recording of me playing Tori Amos's "Silent All These Years."

I haven't yet given up on our society. I refuse to believe that rape is threaded through its fabric. Still, that doesn't make it easier to change. (Notes on the song and lyrics follow)

I'd first gotten to know Tori Amos in third year high school (ca. 2000), and in an all-boys' school that was unheard of. I watched her first on MTV Unplugged and I was enthralled by her skillful piano-wrangling and emotional performances. She'd just released her third album, Boys for Pele. Each time I raved about her music, all I really got was "Isn't she weird? Wasn't she nursing a pig on her CD?" (Just like for the rape victims, nobody really listens.) She's the main influence that got me playing the piano in the first place. She had also been a victim of rape. "Silent All These Years" is the first real piano piece I tried to learn. It's a song about refusing to be a victim and letting your voice be heard. So yeah, excellent message.

Excuse me but can I be you for a while
My dog won't bite if you sit real still
I got the anti-Christ in the kitchen yelling at me again
Yeah I can hear that
Been saved again by the garbage truck
I got something to say you know but nothing comes
Yes I know what you think of me you never shut up
Yeah I can hear that

But what if I'm a mermaid in these jeans of his with her name still on it
Hey but I don't care 'cause sometimes I said sometimes I hear my voice
And it's been here silent all these years

So you found a girl who thinks really deep thougts
What's so amazing about really deep thoughts
Boy you best pray that I bleed real soon
How's that thought for you
My scream got lost in a paper cup
You think there's a heaven where some screams have gone
I got 25 bucks and a cracker
Do you think it's enough to get us there

Cause what if I'm a mermaid in these jeans of his with her name still on it
Hey but I don't care 'cause sometimes I said sometimes I hear my voice
And it's been here silent all these

Years go by will I still be waiting for somebody else to understand
Years go by if I'm stripped of my beauty and the orange clouds raining in head
Years go by will I choke on my tears till finally there is nothing left
One more casualty
You know we're too easy

Well I love the way we communicate
Your eyes focus on my funny lip shape
Let's hear what you think of me now but baby don't look up
The sky is falling
Your mother shows up in a nasty dress
It's your turn now to stand where I stand
Everybody lookin' at you
Here take hold of my hand
Yeah I can hear them

But what if I'm a mermaid in these jeans of his with her name still on it
Hey but I don't care 'cause sometimes I said sometimes I hear my voice
And it's been here silent all these years
I've been here
Silent all these years

12 October 2007

Silk Handkerchiefs with Pesto Sauce

Fazzoletti di Seta al Pesto
Fazzoletti di Seta al Pesto (with title)
I get a few casual requests to cook for or teach people to cook (actually, replace "cook" with "bake" and that will be closer to the truth). One of the reasons I started blogging about food in the first place is to show people that we can all start from zero and make something we'd be proud of. We can all learn together, people! I'm not sure what possessed me one morning to wake up and decide that I would be cooking or baking at least one new thing each week, but it worked out and a few months later (yes, really), I have a bunch of new skills at my disposal. A lot of my friends eat at awesome restaurants regularly-- maybe I was inspired by envy?
Jamie's Italy
Anyway, I was chatting with Graeme about Jamie Oliver and there's quite a bit of ridicult directed at him for being over-the-top and cloying (and some are cynical of his attempts to train disadvantaged people to become chefs), but I don't care (I realize I accidentally typed "ridicult" up there. I like it, it's my made-up word of the year.). The man can cook, and that's pretty much all that matters. I'm not much of a vegetable fiend but I'm learning, thanks to him (and cursing the lack of diversity in the markets, too, thanks to him). I'm grateful too, since his book that I picked up at a used/surplus bookstore (more on my obsession with used book sales in a later post) finally pushed me to make my own pasta due to its gorgeous photographs. (Recipe follows)

Pasta Machine
Me on the pasta machine with my amazing body that can stand to do a sit-up (or five hundred). The view could be better, but if I get a speck of flour in my brother's camera's lens, there would be a Cain and Abel situation going on.

Anyway. For each person you want to allow 85g (3 ounces or 1/2 cup plus 1 tablespoon) all-purpose flour and 1 large egg (or 2 egg yolks for a yellower pasta). The recommended flour is Italian Tipo 00 flour (soft, tender, fine-sieved), but good grief, don't kill yourselves, people. I'm feeding four, so I use 12 ounces of flour and 4 eggs. Make a well in the mound of flour on your clean, dry work surface (or bowl), then crack the eggs into the well. Using a fork, beat the eggs until smooth, then start incorporating the flour from the sides, taking care not to break the well until most of the flour is mixed into the eggs. When it has, flour your hands and start kneading the shaggy dough, letting all your frustrations out for at least 3 minutes, when your dough has turned silky and elastic. Wrap in cling film and leave in the fridge for at least 30 minutes while you work on the pesto.

For some reason we have basil growing in our backyard, so: organic pesto! It's very lemony and strong, and I'm not sure if it's Thai Basil but the stems aren't purple. Pick at the leaves and wash, then pat dry. I'm using a blender, which I think funnily enough is below the mortar and pestle (and way below the food processor) in the hierarchy of pesto-making. Unfortunately our mortar and pestle is tiny and did a very good job of making the leaves brown with my excessive pounding (heh), so I switched to a blender.

  • 3 good handfuls of basil leaves

  • 1 clove garlic, minced

  • 1 handful of pine nuts

  • pinch of salt

  • fresh-ground black pepper

  • good handful of freshly grated Parmesan cheese

  • at least 1/4 cup best-quality extra-virgin olive oil

Annoying ingredient list, eh? Welcome to Italian cooking. And good luck weighing basil leaves. In a food processor or mortar and pestle, grind up the leaves with the garlic, pine nuts, cheese, and salt. If using a blender, stop pulsing every now and then to drive leaves to the bottom with a long spoon. Jamie suggests that if you use the mortar and pestle, mash the pine nuts separately and mix in with the leaf mush. I don't know why. With the motor running, pour the oil in a thin stream until the resulting pesto is oozy. If using a mortar and pestle, you can just whisk in the olive oil. Give the pesto a taste and add black pepper to your taste, and more salt, if needed (I find that a healthy-sized pinch is required). Set aside.

Divide the pasta dough into as many sections as the number you'll feed. Set your pasta machine on the thickest setting for the rollers (7 on my machine), then run one of the dough balls through, then fold and repeat at least once more. You want the pasta to be about 3-4 inches wide, so manipulate the dough by folding and rolling to approximate this. It's my first time to use a pasta machine (for pasta at least), but my best advice is that after you've set the rollers to a thinner setting, you can no longer fold your pasta. It'll destroy your pasta.

Dust the rolled-out pasta with flour lightly, slapping out the excess. Set the rollers at the next-thickest setting (6 on my machine... obviously) and run the pasta through it twice. Cut the resulting long pasta into 2 shorter sheets so you can manage better. Continue the cycle (you don't usually need to dust it with flour again, though) of adjusting the rollers and running the pasta twice until you've made it very thin (2 on my machine, 1 being the thinnest). You should be able to kind of read a newspaper through it. Cut the long pasta sheets into coaster-sized portions and lay in one layer on a damp tea towel to prevent in from drying out while working on the other dough balls.

It may seem like a lot of work, but it is a lot of fun!

Anyway, bring about 1-1/2 gallons (5-6 liters) of water to a rolling boil and add a generous pinch of salt. Drop the silk handkerchiefs in, stirring occasionally to prevent sticking, and boil for 3 minutes. There won't be enough room to boil all of them at once, so use a strainer or a spider to fish them out into a colander while you work on the rest of the pasta. Reserve about a cup of the hot cooking water.
  • 100g (3-1/2 oz) Pecorino cheese

  • a handful of fresh baby basil leaves

Using a vegetable peeler, make a few shavings of the cheese. Grate the rest. Toss the cooked pasta with the pesto and the grated Pecorino cheese. If the pasta appears too tight, loosen it with the hot cooking water, a tablespoon at a time. Top with the basil leaves and Pecorino shavings.

11 October 2007

Medical School According to Peanuts


(Click on the image if you can't see all of it.)
There are two comic strips that are untouchable in my book: Calvin and Hobbes and Peanuts. Calvin and Hobbes is excellent because it depicts childhood and imagination as it is, while Peanuts is brilliant because it depicts adult behavior and philosophy through the actions of a cast of unforgettable children. (You can even teach Christian philosophy with it.) I have a few more wallowing in my collection, but for now, I'll give you Lucy experiencing the harsh reality of medical school. So true, Lucy... So true.

10 October 2007

Pineapple Upside-Down Cake

Pineapple Upside-Down Cake (with title)
I'm not sure if this is a contested fact, but the Pineapple Upside-Down cake just screams "American," which is strange because pineapples aren't a fruit associated with mainland America. I'll have to check what event in the sixties prompted thousands of homemakers to take notice of this treat, with its unfrosted face, gleaming with slick buttered pineapples and sometimes dotted with cherries. I am not even sure what about pineapple lends itself to adorning a humble butter cake instead of the less-popular but still delicious alternatives of stone fruits, cranberries, and apples. Maybe it's because it pairs with brown sugar so remarkably well that they can cut through plain cake and make no apologies for not having frosting. Whatever the reason, it perpetuates its existence through our cravings-- which is what happened with my mom when she saw it on display and wanted to buy one; I told her not to bother as it is much cheaper (and often more delicious) to make at home. (Recipe follows)

Pineapple Upside-Down Cake preparation
The problem was, many recipes call for fresh pineapple, which is really a bother as its ripeness is never guaranteed, and there's the business of peeling, coring, and slicing it, which are great skills but I'm not really up to at this time. Unfortunately, I miscalculated the amount of pineapple tidbits I'd need and opened a 450g can, which left a lot of gaps on top-- I wanted there to be no space so the surface would open up and be all porcupine-y. Oh well, a lesson for next time. Alternatively, you can use sliced pineapple and make the classic "target" patterns on top, or arrange them concentrically to form a giant flower. The choice is yours!

  • 1/2 stick (60g or 1/4 cup) unsalted butter, melted

  • 3/4 cup firmly packed (150g) light brown sugar

  • 1 836g can (2 pounds) pineapple tidbits, drained

At least a few hours before baking, place the pineapple tidbits between thicknesses of paper towels and weigh down in the refrigerator. Alternatively, you could pat the pineapple very dry with paper towels. Stir together the melted butter and brown sugar, then spread on the bottom of a 9-inch cake pan (that is at least 2 inches tall) that has been greased on the sides. Arrange the pineapple on the sugar mixture.
  • 1-1/2 cup (210g) all-purpose flour

  • 1-1/2 teaspoons double-acting baking powder

  • 1/2 teaspoon salt

  • 1/2 teaspoon ground cinnamon

  • 1 stick (120g or 1/2 cup) unsalted butter, at room temperature

  • 2/3 cup (140g) granulated white sugar

  • 2 large eggs, at room temperature

  • 1 teaspoon vanilla extract

  • 3/4 cup (190g) whole milk

Ingredient preparations: in a triple-sifter or a strainer, add the flour, baking powder, salt, and cinnamon, and sift over a bowl or some waxed paper. Add the vanilla extract to the milk and stir to combine.

Place a rack in the center of the oven and preheat the oven to 350°F (175°C). In a large bowl, cream the butter and sugar together using an electric mixer on high speed until light and fluffy (you can do this by hand but it will take a while). Add the eggs one at a time, beating on high speed after each until well-combined. Sprinkle 1/3 of the flour mixture and fold in. Add half the milk and beat until just combined. Repeat with another third of the flour and the rest of the milk, then fold in the last of the flour until just combined. Pour into the pan and spread evenly. Bake for 45 to 55 minutes, until a round toothpick inserted into the center comes out with only a few fine moist crumbs. Cool the cake in its pan on a rack for 15 minutes, then run a thin knife around the edge and lay the serving plate on top. Flip the set-up in a quick motion and cool the cake completely (or you may serve it slightly warm, with ice cream).

08 October 2007

Kung Pao Chicken

Gōng bǎo jī dīng
Kung Pao Chicken
You'd think that if ever I was faced with the impossible conundrum of having to eat just one thing for 2 weeks or on a desert island, or even my last meal, judging from my posts on this blog I'd have dessert. Not true. While most desserts will have the tendency to pall, there are many entrées that are capable of keeping the taste buds satisfied; one of my favorites (I'll get back to you if I decide it's ultimately my favorite) is Kung Pao. Kung Pao chicken was a dish introduced to me by the sitcom Seinfeld. Kung Pao spaghetti was my first taste of it-- at California Pizza Kitchen, no less. After that, if offered on the menu, I simply could not not order it. It's even one of the few dishes where I tolerate those obnoxious cucumbers. And thanks to the recent availability of Sichuan peppercorns at Rustan's supermarkets (though I'm sure you could procure them at Chinatown in Binondo quite easily), it can now be done at home, replicating the perfect fragrance and exquisite heat of any version you can find in a restaurant-- which, mind you, may not even shell out for the peppercorns. The recipe I use here is from Chryz with a few improvisations and adjusted instructions of my own. I recommend that you visit his site for an excellent pictorial as well as tons of other gorgeous recipes. (Recipe follows)

Now, the problem is that I couldn't find dried red peppers which classically grace the top of the dish. No problem. I just made my own. I didn't have enough time to bring them to dry pepper perfection, but just enough to complete the effect. I placed about 20 chili peppers on a baking sheet and placed them on the bottom rack of the oven for 6 hours at 150°F (65°C). The ones I didn't use I can finish in the sun.
Oven-Dried Chili Pepper
Before and after.

  • 3 respectably-sized chicken breasts, total of about 600-700g, no skin, bone, or cartilage (save them for another use)

  • 1 red bell pepper

  • 1 medium cucumber

  • 1 medium red onion

  • 5 stalks green onion

  • 50g (1/2 cup) roasted peanuts, unsalted or not

  • 1 tablespoon vegetable oil

  • 1 tablespoon cornstarch

  • 1 tablespoon Shao Hsing (Chinese cooking) wine, rice wine, or dry sherry

  • 1 tablespoon light soy sauce

Dice the chicken into 1-inch pieces at most, but at least be uniform. Place the chicken cubes, oil, cornstarch, wine, and soy sauce in a bowl and give a quick toss before placing in the refrigerator for 30 minutes to marinate. Dice the pepper and cucumber into 1/2-inch squares or cubes, dice the onion, and chop the green onions into 1/2-inch pices.
  • 3 tablespoons Hoisin sauce

  • 4 tablespoons light soy sauce

  • 3 tablespoons Shao Hsing (Chinese cooking) wine, rice wine, or dry sherry

  • 2 tablespoons apple cider, rice wine, or red wine vinegar

  • 3 tablespoons oyster sauce

  • 2 tablespoons brown sugar, honey, or white sugar

  • 2 tablespoons chicken stock, or a small pinch chicken stock powder plus 2 tablespoons water, or 2 tablespoons water

  • 1 tablespoon vegetable oil

  • 1-inch knob of ginger

  • 3 garlic cloves

  • 7 dried chili peppers

  • 1 tablespoon Sichuan peppercorns

  • 2 teaspoons Sesame oil

Mince the garlic and grate the ginger; set aside. In a wok or any suitably large frying pan, dry-roast the dried red peppers and the peppercorns until they release their aroma; set aside. In a blender or food processor, combine the hoisin sauce, soy sauce, wine, vinegar, oyster sauce, sugar, and chicken stock. Toss in the roasted peppercorns and 2 of the dried peppers and purée until no big chunks of the dried red pepper remain and the peppercorns are pulverized. If you don't have a blender or food processor or if you want to be more thorough, crush the peppers and peppercorns with a mortar and pestle, then just whisk together with the sauce in a small bowl or use the blender anyway.

In the same pan, heat the oil over high heat (smoking hot really) and add the chicken pieces until it has cooked through (the pink inside has just disappeared and try to avoid cooking it longer than that; but even if you do, it will still be delicious). Drain the chicken from the pan, leaving the hot oil behind, and set aside. You could also fry the peanuts until they achieve a darker brown hue (especially if you only have unroasted peanuts) but I didn't bother. In the same oil, sauté the cucumber, onion, green onion, and red bell pepper for about 4 minutes; just to remove their rawness while still retaining their crunchiness. If they start to release liquid, stop cooking and drain them right away. In the same oil, sauté the ginger and garlic for 30 seconds. Add the contents of the blender (the sauce) and bring to a boil. Keep it at a boil until it has reduced to a thick syrup-like consistency. Add in the cooked chicken, peanuts, the rest of the dried peppers, and cooked vegetables and toss to heat the chicken through and coat all the pieces with sauce. Transfer to your serving plate and drizzle with sesame oil. Serves 6 people.

It may seem like a lot of work but it only takes a short time (the drawback, I suppose, would be the long ingredient list). But believe me; it is worth it, and I wouldn't mind eating it everyday for 2 weeks.

05 October 2007

Appointment TV

The great thing about being a bum/ wannabe chef at this time of the year is that all the great television shows have come out/ been renewed in the States. It's scaring me how much time I put into catching television shows, but I've categorized them according to the following:
1. Catch the latest episode, record, keep, buy the DVD - The Office, Saturday Night Live, 30 Rock, It's Always Sunny in Philadelphia, Heroes, Project Runway, America's Next Top Model, American Idol
(Here are all my television and concert DVDs, so these don't include my movie DVDs. As you can tell my taste is rather smutty. Oh well.)


2. Catch it whenever it's on, possibly download then archive or delete - The Daily Show with Jon Stewart, The Simpsons, Scrubs, Ugly Betty, Ed (I have yet to see the fourth season)
3. Catch it when I can - Family Guy, Everybody Loves Raymond, Law and Order: Special Victims Unit
4. Catch it when I remember it's on or have nothing better to do - My Name Is Earl, Medium, Comedy Inc., Nanny 911, Jeopardy!

Saw it once but didn't get into it: Entourage, The Loop, American Dad, Kitchen Confidential, Hell's Kitchen, Top Chef, CSI: New York
Used to watch regularly but lost interest: House, Lost, Queer Eye, Six Feet Under, The Amazing Race, The Apprentice

Shows I hate: Grey's Anatomy, Desperate Housewives, That 70's Show, Two and a Half Men, CSI: Miami, countless other really bad sitcoms (think: War at Home)

Currently, I'm trying out Pushing Daisies, Tell Me You Love Me, and Dirty Sexy Money to see if they're interesting enough. I've refrained from downloading Chuck and Back To You since I'm more or less sure that they will eventually be shown on local (cable) television.

Please do not try to calculate the number of hours that totals to.

04 October 2007

Linguini Avgolémono me Agkinara kai Fasolia

(Egg-Lemon Linguine with Artichoke Hearts and Green Beans) Greek pasta. When you hear those two words, what comes to mind? I believe the usual answer would be: feta cheese, olives, tomatoes, fennel. That's all well and good, but there's a lot more to Greek cuisine than the usual stereotypically Greek ingredients. Take, for example, Avgolémono Sauce. It's one of those flavor combinations that not everyone will agree with (hello: intense lemon flavor in savory dishes), but I do love its tang, its maturity, its freshness. Plus, with this recipe you get loads of vegetables so you can reach your 5 servings a day. This recipe is from Bon Appetit (May 2006). I suppose my pasta would look a lot better if I had used shredded Parmesan cheese instead of grated, but that's all I could come up with at a moment's notice. (Recipe follows)
Linguine Avgolemono with Artichoke Hearts and Green Beans
In a small bowl, whisk together 2 egg yolks and 3 tablespoons lemon juice; add 1/3 cup heavy cream and set aside.

Bring a gallon of water to a rolling boil (I use the electric kettle and just bring it up to temperature in the pan to save gas). Add a generous amount of salt (2 tablespoons or so) and drop in 250g(8 ounces) green beans or "Baguio" beans that have been trimmed and cut into 2-3 inch pieces. If using, drop in 6 ounces of frozen artichoke hearts. I only had canned artichokes, as what is the usual in this country, so there was no need to boil them, only drain them. Strain out the vegetables and place them on a 12-inch skillet. In the same boiling water, add 250g dry linguine noodles and cook 3 minutes short of al dente (the center of the noodle will still have a tiny speck of dry pasta when you bite through it). Reserve 1 cup of the hot pasta water and drain the pasta.

Working quickly, whisk in 1/2 cup of the hot pasta water into the egg-yolk mixture. Add the pasta to the skillet with vegetables and toss in the pan. Pour the egg-yolk mixture, 1/2 cup grated Parmesan cheese, and 1/4 cup chopped flat-leaf (Italian) parsley (about a small bunch). Toss over medium heat until the sauce coats the noodles and thickens slightly, about 3-4 minutes. You can use the remaining 1/2 cup of hot pasta water if the sauce becomes too dry. Season with salt and black pepper. Top with some more grated Parmesan and serve immediately.

02 October 2007

Dimply Plum Cake

(Gâteau aux Prunes) There are a lot of fresh temperate-climate fruits I haven't tasted. Nectarines, quinces, blueberries, raspberries, and peaches, to name a few (though I've had a lot of canned peaches in my life). And me being moderately clueless about which season does which fruit ripen, I have to snatch every opportunity to try them when someone imports them, which is what happened last weekend, when I saw peaches and plums on display. I could have gone with the US white peaches, but there's something so... ravishing about the deep purple of the plums. Before I started this blog, I'd already made a Plum Galette, so I had to try something new. Me being afraid of failure, I approached a reliable source: Dorie Greenspan. She recently posted her recipe for Dimply Plum Cake on Serious Eats and I just had to try it.
Dimply Plum Cake 1
Dimply Plum Cake 2
Gâteaux aux Prunes
The recipe in the link above is pretty straightforward, but I incorporated a few steps that just made common baker sense. First, I sifted the dry ingredients together before mixing them. Second, I folded in the dry ingredients instead of using the mixer. Also, I only had 4 largish plums, so to make a perfect square number on top, I cut each into quarters, and these are not so much "dimply." It did, however, make a beautiful pattern on top that reminds me of Japanese prints. Not entirely Hokusai, but he keeps popping into my head, so I'm sticking with it.

01 October 2007

Everybody's Changing (My 100th Blog Post)

Wow. It's been almost 6 months since I started writing this blog, and I was looking for something appropriate for this stage of my life. I've just finished a big chapter of it, and just as abruptly as its ending I find myself not knowing what any of my friends are really doing. I'm not the gossipy type and neither am I the kind of person who keeps an inventory on his friends. They're all adults, it's their business, it doesn't concern me, they don't need my opinion, I wish them well, blah blah blah.

I did, however, coincidentally see my friend Chris at Megamall and it probably won't be a crime to broadcast that he's getting married this November in Iloilo (sorry I can't make it, obviously...). At the same time I was talking to him, an old friend of mine I hadn't seen in years, Bobing, passed by (coincidence #2) and I hollered at him. He introduced me to his fiancé Joyce and I said congratulations. I then proceeded to shop for new shoes (how non-sequitur-ish of my life).

Click here to listen to my direct digital recording of me playing "Everybody's Changing" by Keane. I'm not singing as my voice, while it can hit all kinds of notes pretty accurately, is very thin and sounds like a little boy's on my horrible microphone.

You say you wander your own land (OH, THAT'S ME)
When I think about it I don't see how you can (Oh, you can't? Watch me)
You're aching, you're breaking and I can see the pain in your eyes
Says everybody's changing and I don't know why

So little time
Try to understand that I'm
Trying to make a move just to stay in the game
I try to stay awake and remember my name
But everybody's changing and I don't feel the same

You're gone from here, soon you will disappear, fading into beautiful light
(Okay... Try not to feel depressed...)
'Cause everybody's changing and I don't feel right

So little time
Try to understand that I'm
Trying to make a move just to stay in the game
I try to stay awake and remember my name
But everybody's changing and I don't feel the same


Maybe the guys of Keane are right. My life seemed to move a whole lot faster when you're surrounded by all sorts of frantically moving friends in a hurry to figure out their lives. There was a point of reference. Now, though, it's a different feeling to have such inner tranquility, troubled only from time to time (like the time I'm writing this) by the feeling that everything you used to know is slipping away, for better or for worse. And why not? It's their right to. I'm not going to compare my life to others'. Nine times out of ten you'll find a reason to feel shitty about it, even if in reality, your life is pretty damn good with you running it.

Anyway, what's up for the future? A whole lot of learning. Since I've started this blog, I've made dozens of new desserts, and I've learned and worked with different types of pastry and cooking techniques. I don't think I'm satisfied yet..