28 August 2007

St. Lily Peach Cake

(Torta di Pesca del Santa Giglia) I don't care if many people, or even my friends, think cake is overrated (or even downright revolting). I love cake. I would almost never turn down a slice of a cake I've never tasted before. I think there's plenty of unexplored territory with regards to the flavors, constructions, and combinations. The problem is that so few people bake. Therefore, many people, when a birthday comes along, buy cake. And they're afraid of buying a cake no one will eat, so they buy the same old chocolate cake, or to be adventurous, vanilla or coffe cake with whipped cream. Pretty soon everyone is tired of cake. This is compounded by the fact that to maximize output, giant cake chains will manufacture only 3 kinds of cake at the most-- vanilla, mocha, and chocolate, and 2 kinds of icing-- boiled (marshmallow) icing and buttercream. Then they pray that you will just find whatever action figure on top interesting. Then, people who are presented with a strange new cake will wonder if the reason they've never seen it before is that it tastes bad.

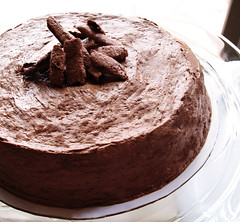
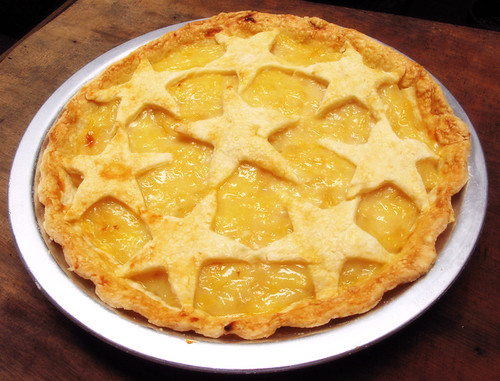
Flo Braker's book, The Simple Art of Perfect Baking, has never steered me wrong recipe-wise. The lady is a cake goddess. She has an incredibly simple recipe for cake: brown sugar génoise filled with peaches and frosted with whipped cream. The taste is surprisingly complex given the fact that the cake is imbibed with fresh, new flavors. And they go really well with peaches. The whipped cream is a cushion for the flavors, rather than an overly sweet icing that saves a bland cake. This is officially a birthday cake for my friend Faith who hates onions. I hope she liked it. I'm pretty sure she did. (Recipe follows)
St. Lily Peach Cake
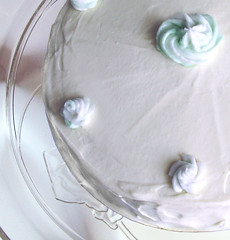
Grease and line an 8-inch cake pan and preheat the oven to 175°C (350°F). Sift together 3/4 cup (75g) sifted cake flour, 1 tablespoon sugar, 1/2 teaspoon cinnamon, and 1/8 teaspoon salt; set aside. Whisk 3 tablespoons heavy cream in a small bowl until slightly thickened; set aside. In a large bowl over hot tap water (50°C/ 120°F), whisk together 2 large whole eggs, 2 large egg yolks, 1/4 cup (50g) light brown sugar, and 1/4 cup (50g) sugar for 30 seconds or until it has reached body temperature. It should be smooth and not feel granular when rubbed. Using a mixer, beat the eggs on medium until it is pale, thick, tripled in volume, and falls back in ribbons from the beaters without sinking immediately, about 3-4 minutes. Sprinkle in and fold the flour mixture into the eggs in 3 additions. Pour 1 cup of the batter into the whipped cream, then fold until combined. Return this to the rest of the batter and fold to combine.

Pour into the pan and spin the pan to create a slightly raised edge. Bake for 20-22 minutes until it sounds spongy when tapped, the sides are contracting, and the center springs back.

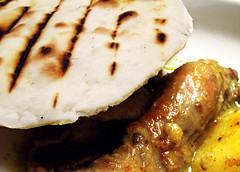
When cool, split in two and fill with whipped cream, slices from a blanched peach, then another layer of whipped cream. Frost the top and sides with more whipped cream.

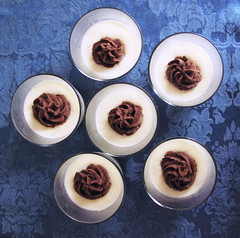
As you can see, I made royal icing rosettes for the top. They were supposed to be lilies but I'm a doofus and I made the royal icing too thick. I squeezed the bag as hard as I could, but so help me I've never squeezed anything so stiff in my life. Only a little bit came out the tip after my forearms nearly fell out (I think there may have been shouting involved--- ARGGHHHH!!!). So I cut my losses and replaced the petal tip with a comfortable open star and just did my corny rosettes. Looks like those realistic flowers will have to wait... (and so will the how-to.)

Maraming Salamat, Rob!

Though I was trying to keep my anguish while reviewing for the medical boards to a harldy audible whimper, Rob, gracious host of the eGullet Society for Culinary Arts and Letters forums dessert forum, showed his support during that time. After I'd passed, he got to work on several very inspired Filipino-based desserts, though he doesn't have any Filipino background that I know of. I'm extremely humbled since he's done more Filipino desserts than I have and probably knows the ingredients in and out. What can I say, the guy is a dessert prodigy.
Check out his Filipino desserts on his blog entry here.
Also, you can check out his descriptions of his desserts at the eGullet forums here.
Here's a sample of a modified cassava cake (got rid of the treacly top and replaced it with a more elegant mango mousse and pineapple):

Many more familiar desserts after the links.

Many thanks for your support, Rob!

White and Dark Chocolate Mousse

Chocolate mousse (at least the version made with eggs, and not with whipped cream) is another one of those secret recipes that can help you get rid of all your egg whites. The thing is, it only has 4 ingredients, so you had better find the best, smoothest-tasting, most exquisite, luxuriousUGHDHSJDHJND sorry... Donald Trump had been taking over the writing for a while. Anyway, BEST chocolate you can find. As in fall-out-of-your-seat. And I again hadn't taken into account that white chocolate is excessively sweet on its own, so naturally its sugary vanillaness (somehow Nigella Lawson has popped in as well) would be amplified when it stands basically alone. Result: a too-sweet invention. Sorry, Pierre Hermé, I won't mess with your mousse. It's bitter all the way from now on. (Recipe follows)
White and Dark Chocolate Mousse
Melt 6 oz (170g) chocolate (ideally bittersweet, NOT WHITE, HAHAHA) in the microwave, then cool until it is only warm to the touch. Meanwhile, boil the milk in the microwave and pour it over the warm chocolate and whisk together gently. Add 1 egg yolk and gently whisk it in. In a separate bowl, beat 4 large egg whites until they hold soft peaks, add 2 tablespoons sugar, then continue beating on high until stiff and glossy. Take 1/3 of the eggs and beat it into the chocolate. Dump the chocolate into the rest of the whites and fold it in gently with a rubber spatula. Refrigerate at least 1 hour.

Make sure your eggs are pasteurized, well-inspected, or you don't feed this to pregnant women, children, and the elderly.

Pond's Age Miracle?

Obviously men do not use skin care products as much as women do-- dare I say almost none, taking into account the more than 4 billion male people in the world. That being said, my skin is quite atrocious. So much so that when I dared myself into using Pond's Age Miracle to put my money where my mouth (or in this case fingers) is, I took pictures but decided not to post them so that little children will not be traumatized if they happen to chance on this blog. So I have here an objective report on my week-long experiment. I think it's warranted given the hype surrounding it on commercials.
Pond's Age Miracle costs about P400 ($9) for a 30mL pump bottle. The ingredients are as follows: Water, Dimethicone crosspolymer/ Cyclopentasiloxane, Ethylhexyl methoxycinnamate, Glycerin, Caprylyl Methicone, PEG-10 Dimethicone/ Disteardimonium hectorite/ Cyclopentasiloxane, Isomerized Linoleic Acid, Caprylic/ Capric Triglycerides, Zinc Oxide/ Triethoxycaprylylsilane, Fragrance, Tetradibutyl Pentaerithrityl Hydroxyhydrocinnamate, Stearic acid, cholesterol, Mica/ Titanium Dioxide, Tocopheryl Acetate, Bisabolol, BHT, DMDM Hydantoin/ Iodopropynyl Butylcarbamate, Linoleic acid, Borago officinalis Seed Oil, Disodium EDTA, Retinyl Palmitate, Sodium Ascorbyl Phosphate, Butylene Glycol/ Carbomer/ Polysorbate 20/ Palmitoyl Oligopeptide/ Palmitoyl Tetrapeptide-7, Coriandrum sativum seed oil.

As far as I can tell with my regular Joe college Chemistry, the mix consists of various moisturizers, vitamin A, C, and E (potent antioxidants), sunblock (it says here SPF 15), and peptidoglycans. The literature boasts many benefits, which we'll go through:
1. Helps visibly reduce fine lines and wrinkles - I'm inclined to think that with Retinyl palmitate in the ingredients, this should happen. However, after the short time of 1 week I've yet to see any improvement in this area (in short: there's no change). In the long term, the mix of sunscreen and antioxidants should retard wrinkle formation.
2. Strong and firm young skin - I'm not sure how they test skin strength. Do they slap you around? My face did feel firmer, for all it's worth. In my mind, when the polymers are dried out in the atmosphere, their grip on your skin and to each other tightens.
3. Helps visibly reduce age spots - I'm 25. I don't think I have age spots, but I do have a bit of sun damage from before and a bunch of acne scars. Since the summer I've done my best to avoid the sun further. In the span of 1 week, no change. There's no even-ing of my complexion at all. They are all still there, taunting me. This was the most disappointing aspect of this trial. Still, using sunscreen that comes with it should prevent further damage and give your skin time to heal your old scars, but is SPF 15 enough in this country? (Maybe for the common office worker it is.)
4. Supple, moisturized skin - I have to confess, I didn't actually feel any different until a friend of mine who had been using it told me her skin felt softer. I guess she is right. Also, I noticed that the early-evening oil slick my face usually turns into was not so prominent, so that's a good point.
5. Radiantly glowing skin - eh? No change. As usual sunscreen does help but my face is still just a light tan. There are no whitening ingredients from that mix as far as I can tell, but I'm not obsessed about being cyanotic.
6. Visibly smoothened skin - No, at least not visibly.
7. Finer skin with visibly small pores - I will say that my skin felt finer, but looking at the pictures there's no difference in pore size, not that mine were humongous.

So what's the verdict? First of all, it's probably better for your skin than nothing. At first I thought I might be getting an allergic reaction but it turned out to be from something else. I have visible skin reactions quite easily but probably didn't have one from this, not that you shouldn't test it on a small patch of skin first and take it easy. It does have fragrance and some natural plant products after all; it may not be safe for all. The best part about it is that late in the day my face feels fresher and not like I dipped it in my desserts.

The problem with the advertisements is that it can be easily misconstrued as proof that it will fulfill all of its skin-renewing properties in 7 days when it only fulfilled about half its promises in that amount of time. Time will tell if it does indeed hold up, but as a guy I won't be spending P400 (though you do use very little) every 3-4 months for a facial product I'm not sure is the best for me and uses up time that I was pretty content with before spending sleeping. Also, the women in those advertisements have probably already been blessed with drum-tight skin and have been using products like Clinique for years. I mean, the editor of a the beauty section of a magazine? God, was she a horror before using this product?

27 August 2007

Fruit Salad Pavlovas

The problem with doing so many custards and creams one after the other is the abundance of egg whites you will accumulate. At least you can freeze them for a long time in freezer bags. The quickest way to get rid of all of them without using a single yolk is by making a meringue: in this case, Pavlova, the Australian (or New Zealand, debatable) dessert named after a famous ballerina. I based this recipe off Chocolatier magazine, and despite cutting the sugar by half, they are (like most Pavlovas) too sweet. The fruit goes some way to cutting the sweetness with a little tartness and freshness. (Recipe follows)
Fruit Salad Pavlovas
Preheat the oven to 150°C (300°F). Beat 4 large egg whites on medium speed until it holds soft peaks, then gradually add 1/2 cup (the original recipe called for 1 cup + 2 tbsp) sugar on medium-high speed until the whites hold stiff, glossy peaks. On medium speed, add 1 teaspoon lemon juice and 3 teaspoons cornstarch and beat until combined. Place the meringue in a large pastry bag fitted with a large open star or plain tip (1/2" or more), then pipe out meringue nests onto a lined and greased baking sheet. What I do is pipe out a 4-inch circle and build around the edge multiple times. Place in the oven and immediately reduce the temperature to 120°C (250°F). Bake for 60 minutes then turn off the oven and leave to cool in the oven for at least 1 hour.

Whip 1/2 cup (125ml) heavy cream until it holds stiff peaks. Drain 1 very small can pineapple slices and cut each into quarters. Drain 1 small can peach slices. Peel and slice 1 kiwi fruit. Cut strawberries into 6 wedges each.

Once the meringues have thoroughly cooled to room temperature, pipe whipped cream on top and arrange the fruits on top. Obviously there's no hard and fast rule for what fruits are appropriate. Don't refrigerate; this has to be served shortly after assembling.

25 August 2007

Blancmanger avec Gelée des Fraises

(Almond and Strawberry Jelly) I know I've done something similar before (major thanks to Clement of A la Cuisine!, one of the first food blogs I've ever seen), but the appeal of a beautifully layered gelatin dessert can't be beat. That, and the fact that feeding people cake and pie one after the other will no doubt make them sick. Better introduce something refreshing and with only minimal fat. Also, for some reason we have boxes and boxes of Jell-O brand strawberry gelatin. Better use it in something, I thought, since they're there! And making real strawberry gelatin requires quarts of strawberries that will drain me of all my money. Alternatively you could use bottled strawberry, pomegranate, cherry, or cranberry juice; those obviously have less sugar. (Instructions follow)
Almond and Strawberry Jelly
Sprinkle 2-1/4 tsp powdered gelatin on the surface of 1-1/2 cups (375g) skim, low-fat, or whole milk in a microwave-safe bowl. I didn't add any more sugar since the strawberry gelatin is plenty sweet. Wait for 5 minutes, then microwave on HIGH for 30 second intervals, stirring in between, until the gelatinous lumps are very few. Don't let it come to a boil; if it gets very hot, let it rest at room temperature before continuing to microwave. Strain the resulting mixture using a fine sieve to get rid of the last of the undissolved gelatin bits. Stir in 2 teaspoons almond extract and let cool to room temperature.

Prepare the strawberry gelatin using half the required amount of water. I used boiling water. Let it cool down at room temperature.

In a 5.5"x2.75"x1.75" (mini) ungreased nonreactive (preferably coated nonstick or stainless steel) loaf pan, pour a 3/8" layer of the almond mixture, which will be about less than 1/3 of the mixture. Use a spoon to pour and pour patiently from close to the bottom of the pan to avoid bubbles and splashes. Place inside the refrigerator in the main compartment as far away from the door to avoid agitation each time the door is opened. Chill for 25-30 minutes. The surface of the blancmanger should be sticky and will only bulge in the center slightly when the pan is tilted. If the surface is not sticky, the gel has set too long and when unmolded the layers will slip apart. Using a spoon, pour slightly less than 1/4 cup of the strawberry mixture on top (make sure it's no longer hot!), making sure not to create bubbles or disturb the layer below. Chill for 25-30 minutes. Repeat slightly less than half the remaining almond mixture, then slightly more than 1/4 cup of the strawberry mixture, then the rest of the almond mixture. Chill a few hours or overnight to hard-set. You'll have quite a lot of strawberry jelly remaining. Ladle into individual cups and eat at your pleasure.

To unmold, dip till just under the rim of the loaf pan in hot tap water for 10 seconds, then place a moist serving platter on top and flip the whole set-up over. Clean the surface with a wet finger. Place in the refrigerator till serving time.

Bridging the Gap: From Concept to Final Work Series 3

Despite a few hiccups, I have to say that Vienna left yet another deeply artistic mark in me (soooo... I'm adding it to a list with London, Venice, Prague, Florence and Brussels), probably because of the pervasively enshrined Art Nouveau movement of the early 1900's. Gustav Klimt is the most prominent artist I could see there. I've seen "The Kiss" before, but seeing it printed on little notepads and t-shirts made me appreciate the beauty of the original work. I probably couldn't wait to exercise its influence on me for the first poster I made for the Department of Obstetrics and Gynecology at PGH.

The Three Ages of Woman by Gustav Klimt.
My brother has a copy of Taschen's inexpensive books on Klimt's works. I really tried to study what makes Klimt's technique unique-- including his love for the detail of textiles. Close-up, I have to admit they looked like a cacophony, but from afar the effect seemed orchestrated. Women were dominant figures in his paintings, so it seemed like a good match for the subject.

Unfortunately, I threw out my old sketches and early paintings for this project, I think (it may be somewhere on my hard drives, but I can't find it). But since the subject was bridging tradition and modern practice, the intricately woven Ilocos blankets of my childhood seemed like the perfect textile for this application. I scanned two of them and they became the basis for her gown.

Here is the finished painting, before it was crowded by too many details (like the organizations, venues, blah blah blah):

24 August 2007

Triple Chocolate Éclairs

I've already outlined how to make beautiful choux pastry from from my previous post on profiteroles. To make bitter, elegant chocolate choux pastry, just add 3 tablespoons Dutch-process cocoa into the flour (sift them together of course). The result is not even a chocolate overload-- the flavors come together and augment each other quite nicely. (Recipe follows)
Triple Chocolate Éclairs
To make chocolate pastry cream, begin by boiling 1 cup milk in the microwave. In a heavy-bottomed saucepan, whisk together 2 large egg yolks, 3 tablespoons (38g) sugar, and 1-1/2 tablespoons cornstarch that has been sifted. Drizzle in the hot milk, whisking all the while. Place over medium heat and, whisking without stop, bring to a boil and continue to cook for 1-1/2 minutes. Whisk in 3-1/2 (100g) melted bittersweet chocolate until thoroughly combined, then take off the heat and scrape over a sieve into a small bowl set over ice water. When cool (about 60°C or 140°F), stir in 1 tbsp + 1 tsp (20g) unsalted butter in 2 additions. Cool completely and store in the refrigerator with a piece of plastic wrap pressed against the surface.

The Concorde

The Concorde is a classic cake that's more than 40 years old, created by Paris pastry chef Gaston Lenôtre. I picked up the recipe from Pierre Hermé's book, not knowing what to expect since I haven't tasted the original, and not even the version of Sugarhouse. The cake is simply 3 chocolate meringue discs sandwiched with chocolate mousse and decorated with chocolate meringue rods; Sugarhouse replaced the chocolate meringue discs with vanilla sponge cake. The resulting cake, though not at all that pretty (the yield for the meringue was much, much lower-- a problem with the size of the eggs or underwhipping?), tasted excellent and you could really appreciate the mingling of textures. (Recipe follows)
The Concorde
Preheat the oven to 120°C (250°F). Whip 4 egg whites at room temperature on high speed until they form soft peaks. Add 1/4 cup (50g) granulated sugar, beat to stiff, glossy peaks and beat in 1/4 cup more sugar at low speed. Fold in 3 tablespoons unsweetened cocoa powder (I used Valrhona) and 1/2 cup (100g) confectioner's sugar (the original recipe called for 1 cup). Using a 1.5cm (1/2") plain round tip, pipe out 3-22cm (8-1/2") circles onto 2 large baking sheets lined and greased, then use the rest of the meringue to pipe out as many long rods using a 7mm (1/4") plain round tip. Place into the oven and keep the door slightly ajar with the handle of a wooden spoon (I used disposable chopsticks). Bake for 2 hours, rotating the pans 2-3 times during this time to keep the cooking even. The discs should be firm but not colored. Close the door, turn off the oven, and dry the meringue discs overnight.

To make the mousse, melt 250g (8-3/4oz) bittersweet chocolate in the microwave, then let cool. Beat 2 sticks + 1-1/2 tbsp (250g) unsalted butter until very smooth, then beat in the cooled chocolate until well-blended. In a separate bowl, whip 6 large egg whites at room temperature with 1 tbsp sugar until they hold stiff, glossy peaks. Beat in 3 large egg yolks and whip for 30 more seconds. Stir in 1/4 of the egg mixture into the chocolate, then fold in the rest of the egg mixture.

Sandwich the discs with mousse and use the mousse the cover the top and sides. Freeze for 2 hours. Cut up the meringue rods into 1.5cm (1/2") pieces. Take out the cake, heat the surface slightly with a hot hair dryer, then stick the meringue rods on the top and sides. As you can see, I barely came up with any rods, so I decided too smooth the sides as much as I could and just pile the few rods I had on top.

23 August 2007

Chocolate and Banana Brochettes

If you can stir and poke stuff, you absolutely have no excuse not to be able to present dessert. I am a big fan of the combination of chocolate and bananas (not to mention bananas and peanut butter), so making this incredibly easy dessert was a no-brainer for my all-dessert party. Now, Grame has been recounting traumatic stories of truffles to me, but as long as you keep the chocolate very dark and very bitter, and the portions small, you should be able to avoid the nausea that results from consuming to sweet a treat. (Instructions follow)
Chocolate and Banana Brochettes
To make the truffles, simply chop 230g of bittersweet chocolate very finely and place in a medium bowl. Bring 250g of heavy cream to a boil in the microwave and pour over the chocolate, then gently stir without creating bubbles until the chocolate is completely melted and the mixture is smooth. Set aside. Work 4 tablespoons (60g) room-temperature unsalted butter in a small bowl with a rubber spatula until creamy. When the chocolate is only warm to the touch, add the butter in two additions until incorporated, mixing gently with the spatula. Place in a 4x8" loaf pan and freeze. When frozen firm, scoop out portions with a small spoon, ice cream scoop, or melon baller, then roll in a small bowl of cocoa powder (I used Valrhona). Toss gingerly in your hands to get rid of the excess. Refrigerate till ready to use.

At the ast minute, thread 2 banana slices and a truffle onto a bamboo skewer. That's it.

21 August 2007

Blueberry Cheesecake Napoleons

(Millefeuille Myrtille avec Fromage à la Crème) I recently held an all-dessert party for my friends (more on that later), and while searching for great dessert minis in between studying (a bad idea), I came across Cakechef, a Japanese professional pastry chef site. What's incredible about it is that they will show you the entire recipe for free, complete with instructions. Assuming you have the materials needed (and that's a pretty big assumption), you can recreate signature desserts (and they're very creative in Japan) at home. That's a sweet deal (free), not even Chocolatier Magazine or Pastry Art and Design Magazine can match that. They had Millefeuille Myrtille, or Blueberry Napoleons, and it looked impressive despite being easy to make. The catch was that I had never worked with puff pastry before. (Instructions follow)
Blueberry Cheesecake Napoleons
Puff pastry (pâte feuilletée) is supposedly an easy pastry; in involves encasing a block of butter in a dough (the détrempe) and rolling it out and folding it six times (the tourage), multiplying its layers in geometric progression. Unfortunately, even at its coldest, the Philippines is too warm to make puff pastry in, so I resorted to buying a kilo from Santi's Delicatessen for about P250 (£2.50 or $5). You get 5-10 inch squares. After defrosting for 5 minutes at room temperature, cut 2 large squares into 16 squares each, being careful not to drag the knife across the pastry (you have to use a guillotine motion). Preheat the oven to 230°C (450°F). Place the puff pastry squares on a lined and greased baking sheet, giving about at least half an inch of space in between each. Moisten the tops lightly with water, and dust (?) the tops evenly with granulated (ideally superfine) sugar. Place in the oven and immediately turn down the temperature to 190°C (375°F). Bake for 10 minutes, then weigh the top with a cooling rack gently and bake for 10 more minutes. Remove from the oven, then turn up the temperature to 245°C (475°F). Flip all of the puff pastry squares, dust the tops evenly with confectioner's sugar, and bake for 5 minutes. Remove from the oven and cool.

The cream cheese diplomat cream is another first for me, and it was kind of fun to make. You need pastry cream, whipping/ heavy cream, and cream cheese. For the pastry cream, boil 1 cup of whole milk in the microwave. In a heavy-bottomed saucepan, combine 3 large egg yolks, 1/4 cup sugar, and 2 tbsp + 2 tsp cornstarch. Whisk together to combine, then drizzle in a bit of the hot milk to get the yolks used to the temperature, then add the rest of the milk, whisking all the while. Place over medium heat and whisk vigorously and constantly. Let it come to a boil, then continue cooking for 1-1/2 minute (still whisking!). Stir in 1/2 teaspoon vanilla and strain into a small bowl set over ice water. Let it cool down to 60°C (140°F), then stir in 1 tbsp + 2 tsp unsalted butter in 2 additions until combined. Let it cool completely, cover with plastic wrap to the very surface, and place in the refrigerator.

Whip 400g (about 1-2/3 cups) whipping/ heavy cream until it holds firm peaks. Fold in the pastry cream until combined. This is what's called Diplomat Cream.

Whip 200g of room-temperature cream cheese until smooth, then add about a quarter of the diplomat cream, folding to combine. Then dump the entire mixture on top of the rest of the diplomat cream and fold until thoroughly combined.

To assemble the napoleons, Take a square of puff pastry, pipe a circle of the cream cheese filling, then top with a spoonful of fresh or canned blueberries. Top with a second square of puff pastry and repeat.

20 August 2007

Chocolate and Pear Tendon

Champorado is sweet chocolate rice porridge that is definitely one of those childhood treats, and never fails to take me back to times when the rain was pouring so hard that classes would be suspended and you'd be served a hot bowl, topped liberally with swirls of condensed milk, with the can of milk next to you so you could sneak in a few spoonfuls in between chocolate porridge. It's a miracle that I survived such blatant disregard for my metabolism, but now this guy wants his guilty pleasures to grow up with him. So, we eat the champorado with the sugar built in, and no milk (condensed or otherwise) added. The popular partner of champorado is tuyo (literally "dry"), which is small, dried, salted fish split in two. No thanks. I'm taking a cue from Pierre Hermé and making a dessert donburi. I hope I get points for presentation alone. I even served it with maple syrup, to resemble the usual tempura sauce, which turned out to be a perfect foil for the pears. (Instructions follow)
Pear Tempura with Chocolate Rice Porridge
Take 1 cup of glutinous, or malagkit (literally "sticky") rice (I suppose this would be arborio or any other very starchy rice) and place in a heavy-bottomed saucepan with 4 cups water. Bring to a boil over low heat (the rice will start to become translucent), then stir in 1/2 cup unsweetened cocoa and 1/2 cup sugar (or to taste); alternatively you could use sweetened cocoa. Continue cooking, stirring constantly to avoid scorching, for 6-8 minutes or until the rice is tender.

For the pears, I had a bit of a problem. The varieties being sold-- I'm not sure if they were all Korean-- were all approximately spherical in shape. The classic pear shape would have worked better masquerading as ebi tempura. Anyway, peel the pears, cut each into 8 wedges, remove the cores, then batter in an equal volume (1 cup to 1 cup) mixture of instant tempura batter mix and ice water (I believe this is about an 8:5 ratio of water to tempura mix by weight). I had a problem with the batter slipping off the pear slices, which might be remedied by dredging the pear slices lightly in flour before dipping in the batter, but instead I just went ahead and deep-fried them in 350°F (180°C) oil, then battered them again and fried them again. It's not a big deal as frying them only takes 2 minutes, until they reach your desired level of golden-ness.

19 August 2007

Pineapple Pie

Pineapple Pie
There are a few pineapple-growing regions in the Philippines, and the most accessible one from where I live is Tagaytay. Also a coconut-growing region, they take advantage of the relatively cooler climate they have (probably a good 8-10°C colder by my estimate throughout the year) by enticing tourists and producing take-away items in dizzying, "whoever-will-eat-all-of-these" quantities. So they make Coconut (Buco) and Pineapple Pies. However, over the years the Pineapple Pie I remember from my childhood has become rarer, outsold by its coconut sibling. And I hated that, because Pineapple Pie is one of my favorite bakery items. So I had to recreate it. (Recipe follows)

This recipe is from the Maya Kitchen Culinary Arts Center, which develops recipes for the Liberty Flour Mills. It's not the freshest-tasting pie, but what I like about it (same reason I love the classic take-away pie) is that it's so toothsome.

You can use any short pie pastry. I used the one they indicated in the recipe, with 2 cups of all-purpose flour, 1 teaspoon salt, 1/2 teaspoon sugar, 1/2 cup (1 stick) frozen butter, 3 tablespoons shortening, and 5 tablespoons ice water. It was a little saltier than I'd expected, but in the end it tied up well with the filling.

Separate the finished pie dough into a large (2/3) and a small (1/3) portion. Roll out the larger portion and line a 9-inch pie pan. Prick with a fork all over and bake in a preheated 400°F (205°C) oven for 10 minutes.

For the filling, combine 1 567-gram can of crushed pineapple (with syrup and all), 1 cup sugar, 1 tablespoon lemon (or Philippine lemon) juice, 2 large eggs, 1/3 cup all-purpose flour, and 1/4 teaspoon vanilla in a heavy-bottomed saucepan and bring to a boil, stirring constantly, over medium heat. Cook for a few minutes more until thick-- my gauge was that I started to actually make an effort stirring it. By the way, that sounded like too much sugar to me (especially for fruit that was packed in heavy syrup), so I used only 1/2 cup sugar with no problem. Cool the filling.

Pour the filling into the pre-baked cooled pie shell, then roll out the smaller portion of dough. Traditionally it's formed into a lattice on top, but I cut out stars with a cookie cutter instead and pinched them together on top. Brush with an egg wash (small, slightly beaten egg) and continue baking for 20 minutes, but I let it go for a while longer till I was satisfied with how golden-brown the top was.

16 August 2007

Women's Health in Full Circle: From Concept to Final Work Series 2

I'm still in the process of organizing my thoughts on the time I spent in Europe, but some places truly inspired me in a permanent way: I'm talking about Prague. The hotel we stayed in was beautifully decorated with prints from Czech artist Alfons Maria Mucha, an artist whose work I was familiar with (due to its extensive influence in the Arts and Crafts movement, as well as Art Nouveau and modern comic book art) but I couldn't pin a name to before.

When there was a contest to make a poster for the upcoming 2007 Obstetrics and Gynecology Postgraduate Conference, I knew the time had come to test how deep I had been imprinted. (The previous year, I also made the official poster, but my influence had been Gustav Klimt-- a blog post for another time.) The theme was "Women's Health in Full Circle." Mucha had made a number of awesome series, from the muses to the different times of the day, plants, and flowers. I used my previous training in plant taxonomy (when I was a Biology student a million years ago) and tried to integrate a series of my own into the theme-- from the start, I knew I would be making the seasons of the year.

On the left is Mucha's "Laurel," which is part of a series. On the right are some of the initial sketches I made, obviously drawing inspiration from that particular piece. I made several more sketches:


Then I laid them out in traditional Art Nouveau (oxymoron) style. Thick white borders (if I had more skill I'd do the flourishes myself).

I proceeded to color the art as it would appear in nature. The backgrounds would look infinitely better as a mosaic I drew myself (as Mucha did for "Laurel" above), but I was pressed for time, so I used the Crystallize filter in Photoshop on a few choice stock photographs.

Once the colors are in place, antique the whole thing with a global adjustment layer, on the color balance, levels, and hue & saturation. This is what was shown to the committee, and what won the competition.

I had a few minor problems with the collaboration (winning doesn't mean the end of work!). First of all, they wanted a postpartal woman, not premenopausal. Second, they wanted to use local fruits and flowers (I protested this, since technically there aren't even 4 seasons in the Philippines, so the distinction doesn't exist in terms of flora). Third, they wanted the young girl to look more like a child. You can't Photoshop those away, so it's back to the drawing board:


Even younger, they said. They wanted pigtails. Only to be grossly obvious... Anyway, I protested that it wouldn't look classy (I WAS going for the Czech/ Parisian/ Belgian feel), so I made "classy pigtails."

Here is the pre-final work, after adding color (blush on the cheeks, shadows, etc) and warmth. Lesson: you have to listen to your client, but always have legitimate reasons for not wanting to do something. Also, if you can draw a little, the effort will show.

13 August 2007

"Better Than Pita" Grill Bread (with how-to)

I have this strange fascination with flatbread. Maybe it comes from not having enough in my life. There was a time when I would have a piadina (Italian flatbread sandwich) almost every week; now I miss it. Sometimes I even think of the Roti Canai at Banana Leaf and my mouth waters. I just discovered that it's incredibly difficult to make, but that doesn't mean I'm not going to attempt it in the not-too-distant future. I can sense my future now... There's always delicious, flaky bread and it smells of curry. In the meantime, I have to satisfy myself with much simpler recipes, and I thought I'd stumbled upon hidden treasure when I saw this recipe for "Better Than Pita" Grill Bread from Gourmet Magazine. I don't think it was as flaky and airy as the one made in George's Downtown Cade and Diner in Indiana where the recipe originated, but I think that's the fault of our climate, again, developing the bread too quickly. (Instructions follow)
Grill Bread with Chicken Curry
Click on the link above for the recipe. You start out with all your dry ingredients and wet ingredients:

You'll come up with this dry, shaggy dough:

Knead it for 2 minutes, when it will come together slightly:

Let stand for 10 minutes then separate into balls and roll out.


Grill until it puffs a little and blisters. The recommended time is 2 minutes but I grilled them for longer because the charred bits add a lot of flavor. The bread doesn't burn easily, don't worry.

The verdict? There's not enough liquid in the recipe, so it tasted slightly doughy/ floury. Some commenter on the epicurious site added a whole egg instead of just 1 tablespoon, which I believe would help. The flat texture notwithstanding, it still made a great accompaniment to the chicken curry.

Back From "Vacation"

After half a month's hiatus, I'm back... And I'm not going to make any desserts. Not yet, anyway. I'm saving it all for a possible celebration-slash-birthday party for a friend, wherein we will eat nothing but dessert. I won't know if it's sure until I get the results from the medical boards. Which is due in about 36 hours. Sounds short (only the rest of my life!). I suppose even if I fail the licensure, I can still make as many desserts as I want, but wouldn't that be depressing? What if I throw a party for my friends who passed and I failed?

Anyway. After Sunday, I'll have enough desserts to post about here to last every day till September. In the meantime, maybe I should make actual food. Or maybe even breakfast...

P.S. Happy Birthday Faith!